Introduction
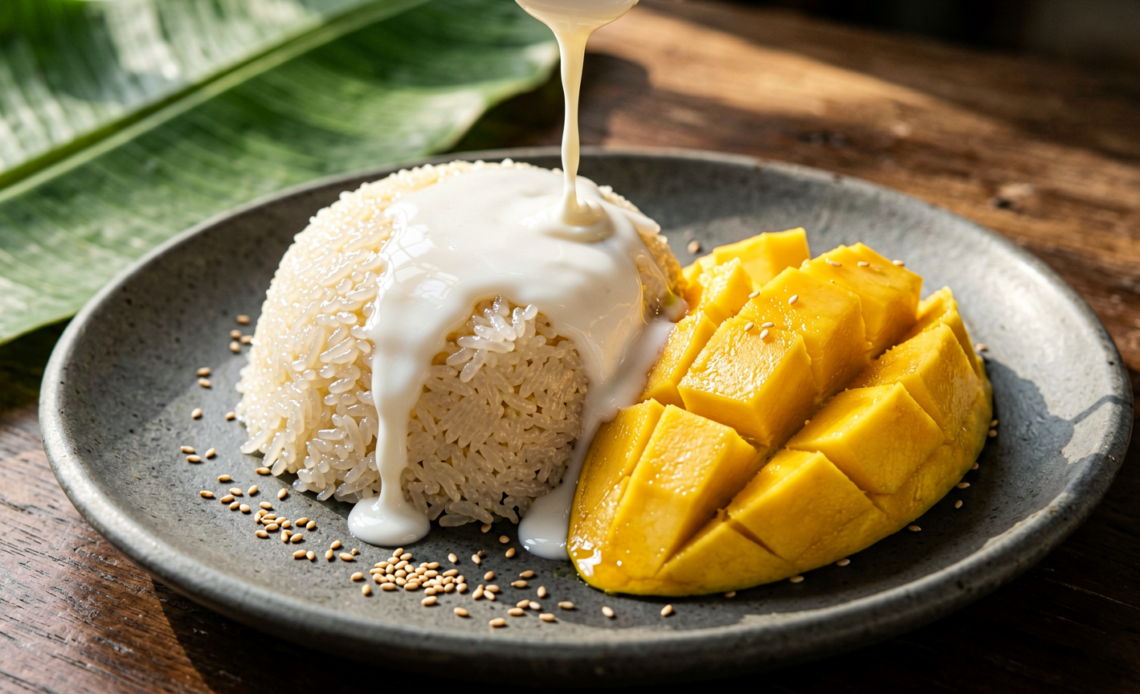
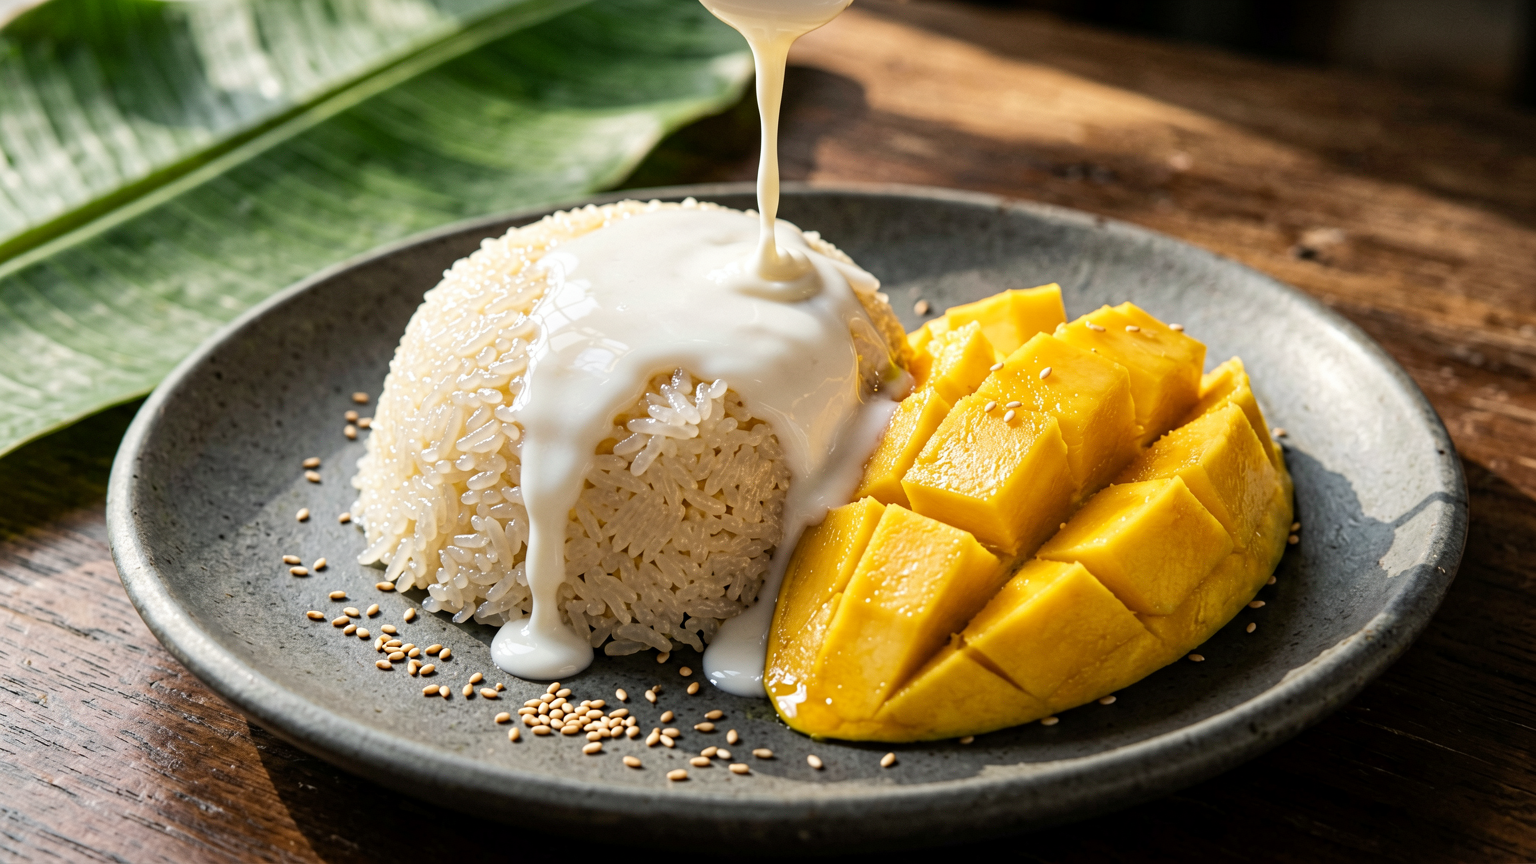
Imagine this: warm, fragrant sticky rice infused with sweet coconut milk, topped with luscious, ripe mango, and drizzled with a rich, salty-sweet coconut cream. This isn’t just a dessert; it’s a tropical escape on a plate! Mango Sticky Rice, or ‘Khao Niao Mamuang’ in Thai, is a beloved classic that’s surprisingly simple to recreate in your own kitchen. Get ready to transport your taste buds to the streets of Bangkok with this authentic recipe.
Recommended Kitchen Tools
To make this recipe easier and more efficient, here are some tools I recommend:
-
Rice Cooker
Check Price on Amazon →
-
Saucepan
Check Price on Amazon →
-
Fine-mesh Sieve
Check Price on Amazon →
Why You’ll Love This Recipe
This Mango Sticky Rice recipe is a winner because it perfectly balances sweet, creamy, and fruity flavors with a delightful chewy texture. It’s incredibly satisfying, relatively easy to make, and always impresses guests. Plus, the vibrant colors make it a feast for the eyes as well as the palate!
Ingredients
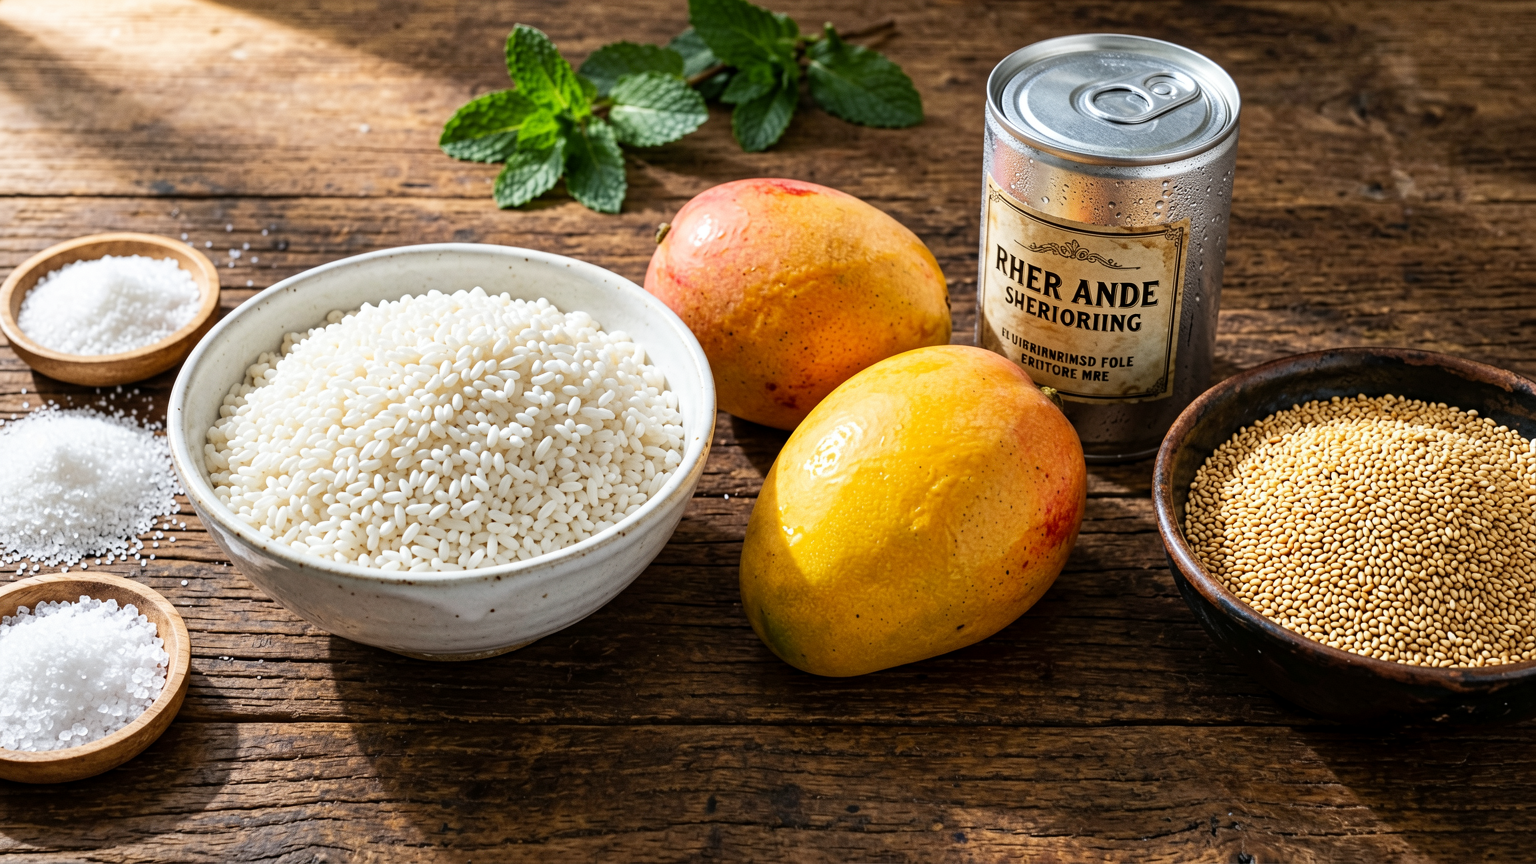
- 2 cups glutinous rice (sweet rice)
- 1 can (13.5 oz / 400ml) full-fat coconut milk, divided
- 1/2 cup granulated sugar
- 1 teaspoon salt
- 2 ripe mangoes, preferably Nam Dok Mai or Ataulfo
- 1 tablespoon toasted sesame seeds (optional, for garnish)
- 1/4 cup coconut cream (the thick part from the top of a chilled can of coconut milk)
Instructions
- Rinse the glutinous rice thoroughly under cold running water until the water runs clear. Soak the rice in plenty of cold water for at least 4 hours, or preferably overnight.
- Drain the soaked rice well. If using a rice cooker, place the drained rice in the cooker and add 1 1/4 cups of water. Cook according to your rice cooker’s instructions for white rice. If cooking on the stovetop, combine the drained rice with 1 1/2 cups of water in a saucepan. Bring to a boil, then reduce heat to low, cover, and simmer for 15-20 minutes, or until the water is absorbed and the rice is tender. Let it steam, covered, for another 10 minutes off the heat.
- While the rice is cooking, prepare the coconut milk mixture. In a separate saucepan, combine 1 cup of the full-fat coconut milk, granulated sugar, and salt. Heat over medium-low heat, stirring constantly, until the sugar and salt are completely dissolved. Do not boil. Remove from heat.
- Once the rice is cooked and has steamed, transfer it to a bowl. Pour about two-thirds of the warm coconut milk mixture over the hot rice. Gently fold the mixture into the rice until well combined. Cover the bowl and let it sit for at least 20-30 minutes, allowing the rice to absorb the coconut milk and become creamy.
- Prepare the coconut cream topping. In a small saucepan, gently heat the reserved 1/4 cup of coconut cream (the thick part) with a pinch of salt. Stir until smooth and slightly thickened. Do not boil. Set aside.
- Peel and slice the ripe mangoes. Aim for even slices or cubes.
- To serve, spoon a generous portion of the sweetened sticky rice onto each plate. Arrange the fresh mango slices alongside the rice. Drizzle the warm coconut cream mixture over the rice and mango. Garnish with toasted sesame seeds, if desired.
Tips
- Use good quality, full-fat coconut milk for the richest flavor and creamiest texture.
- Don’t skip the soaking step for the glutinous rice; it’s crucial for achieving the right sticky texture.
- Ensure your mangoes are perfectly ripe for maximum sweetness and flavor.
- Taste the coconut milk mixture before adding it to the rice; adjust sugar and salt to your preference.
- For an extra layer of flavor, you can add a pandan leaf to the coconut milk while it heats (remove before mixing with rice).
Serving Suggestions
- Serve immediately while the rice is still warm and the mango is fresh.
- This dessert is best enjoyed on its own, allowing the simple, classic flavors to shine.
- For a slightly different twist, you can serve it with a small side of fresh coconut flakes.
Storage Tips
Mango Sticky Rice is best enjoyed fresh. Leftovers can be stored in an airtight container in the refrigerator for up to 2 days. Reheat the sticky rice gently in the microwave or a steamer before serving. The mango should be stored separately and added just before serving to maintain its freshness.
FAQ
Q: Can I use regular rice instead of glutinous rice? A: No, regular rice will not achieve the characteristic sticky and chewy texture essential for this dessert.
Q: How do I know if my mangoes are ripe enough? A: Ripe mangoes will have a sweet aroma and yield slightly to gentle pressure. They should not be too hard or too mushy.
Q: Can I make this recipe ahead of time? A: The sticky rice can be made a few hours in advance and kept warm, but it’s best assembled and served fresh with the mango and coconut cream topping.
Nutrition Information
- Calories: Approx. 450-550 per serving (varies based on mango size and amount of coconut milk)
- Protein: 5-7g
- Fat: 20-30g
- Carbohydrates: 60-70g
The Ultimate Authentic Mango Sticky Rice Recipe: A Sweet Thai Dessert Classic
Ingredients
Method
- Rinse the glutinous rice thoroughly under cold running water until the water runs clear. Soak the rice in plenty of cold water for at least 4 hours, or preferably overnight.
- Drain the soaked rice well. If using a rice cooker, place the drained rice in the cooker and add 1 1/4 cups of water. Cook according to your rice cooker's instructions for white rice. If cooking on the stovetop, combine the drained rice with 1 1/2 cups of water in a saucepan. Bring to a boil, then reduce heat to low, cover, and simmer for 15-20 minutes, or until the water is absorbed and the rice is tender. Let it steam, covered, for another 10 minutes off the heat.
- While the rice is cooking, prepare the coconut milk mixture. In a separate saucepan, combine 1 cup of the full-fat coconut milk, granulated sugar, and salt. Heat over medium-low heat, stirring constantly, until the sugar and salt are completely dissolved. Do not boil. Remove from heat.
- Once the rice is cooked and has steamed, transfer it to a bowl. Pour about two-thirds of the warm coconut milk mixture over the hot rice. Gently fold the mixture into the rice until well combined. Cover the bowl and let it sit for at least 20-30 minutes, allowing the rice to absorb the coconut milk and become creamy.
- Prepare the coconut cream topping. In a small saucepan, gently heat the reserved 1/4 cup of coconut cream (the thick part) with a pinch of salt. Stir until smooth and slightly thickened. Do not boil. Set aside.
- Peel and slice the ripe mangoes. Aim for even slices or cubes.
- To serve, spoon a generous portion of the sweetened sticky rice onto each plate. Arrange the fresh mango slices alongside the rice. Drizzle the warm coconut cream mixture over the rice and mango. Garnish with toasted sesame seeds, if desired.


